If you’ve ever wandered down the home brewing aisle at a local homebrew shop, you might have noticed a sea of glass, plastic, and metal containers marked specifically for fermentation, storage, or mashing. But as someone who’s spent years supplying food-grade glass jars to home brewers (and even brewed a few batches myself, back when I was just a hobbyist), I can tell you that the common food jar is one of the most underrated tools in a home brewer’s kit. I’ve watched new brewers skip these simple, affordable containers for fancy, overpriced equipment, only to run into avoidable issues mid-brew, and I’ve seen seasoned brewers turn to food jars for last-minute fixes that saved a batch they thought was ruined. Today, I want to break down the science-backed, practical uses of food jars in home brewing, why they work so well, and how to use them correctly—no overly complicated jargon, just real-world advice from someone who’s both a supplier and a fellow beer lover. Food Jar

Let’s start with the basics: not all food jars are equal, and that’s a key point to get right if you’re going to use them for brewing. When I source jars for my customers, I only provide BPA-free, food-grade borosilicate glass or heavy-duty food-grade plastic jars. The reason borosilicate matters is its thermal stability: it can handle the dramatic temperature swings home brewing throws at it—from boiling water for sterilization (up to 212°F) to cold fermentation (as low as 50°F, even lower for lagers) without cracking or warping. Regular glass jars are fine for cold uses, but they can shatter if you pour boiling water directly into them, which is a safety risk no home brewer needs. Plastic jars, for their part, are lightweight and shatterproof, but they’re not ideal for long-term fermentation because some low-quality plastics can leach chemicals into beer over time, especially at warm temperatures. That’s why I always advise brewers to stick to truly food-grade options, whether they buy from my supply line or another trusted source.
The first and most common use for food jars in home brewing is as primary fermentation vessels, and this is where I’ve seen them shine most for small-batch brewers. Let’s do a quick refresher on primary fermentation: it’s the stage where yeast eats the sugars in your wort (the sweet, unfermented liquid you get after mashing grains) and produces alcohol, CO2, and flavor compounds like esters that give beer its character. For most home brewers, that means 1 to 5 gallons of wort, and a standard 1-gallon food jar is the perfect size for test batches or small-batch experimental brews. The science here is simple: the airtight seal (if you use a proper rubber gasket lid and a fermentation airlock) keeps out airborne wild yeast and bacteria, which are the #1 cause of off-flavors like sourness, cardboard-like oxidation, or “metallic” taints. A big plastic fermentation bucket can be cheaper upfront, but food glass jars let you see exactly what’s happening inside during fermentation—no lifting the lid or opening the airlock to check. You can watch the krausen (that foamy, bubbly head of yeast and CO2) rise and fall, spot any unusual sediment early, and even check the color of your beer or take gravity readings without disturbing the yeast. I had a customer last year who brewed a Belgian tripel in a 1-gallon food jar, and he told me being able to watch the krausen peak at 3 inches told him exactly when to move it to secondary fermentation—something he missed with his old opaque plastic bucket. That level of visibility is a game-changer for new brewers still learning to read their batches.
Another underrated use is for gravity testing and yeast propagation, two steps that are critical for consistent, high-quality beer. Specific gravity is a measure of the sugar content in your wort at the start and end of fermentation, and it tells you how much alcohol your batch will produce (you subtract the final gravity from the original gravity and multiply by a constant). To test this, you need a small sample of wort, and a 16-oz food jar is the perfect size to hold that sample. Before I started supplying brewing jars, I used to borrow small cups from my kitchen, but they were too narrow to fit a hydrometer properly, which gave me wrong readings that messed up my batches. Food jars have a wide enough mouth to insert a hydrometer easily, and their straight sides mean the hydrometer floats evenly, so you get an accurate reading every time. The bigger use for propagation: if you want to brew a batch of beer that has a bold, distinct yeast character (like a hefeweizen or a pale ale), you need a healthy yeast starter. A yeast starter is a small batch of sugary liquid that you feed dried or liquid yeast to multiply it before adding it to your main wort, so the yeast is active enough to ferment all the sugar evenly. A 1-quart or 2-quart food jar is ideal for a small yeast starter—just make sure to sanitize it properly, add your wort and yeast, cover with a loose lid (so CO2 can escape), and shake it once a day to aerate the yeast. I’ve had brewers tell me they skipped yeast starters for years because they thought they needed a fancy flask, but a simple food jar works just as well. Last month, a home brewer who buys my 1-gallon jars reached out to say he used one to make a yeast starter for an imperial stout, and the yeast fermented the full batch in 4 days instead of the usual 7—something he attributes to the healthy culture he grew in the jar. That’s not luck, that’s the simple science of giving yeast a safe, aerated space to multiply.
Food jars also come in clutch for mashing and lautering, especially for all-grain brewers who grind their own grains instead of using extract. Mashing is the step where you mix ground grains with hot water to convert starches into sugar, and you need a vessel to hold the grain and water mix while that conversion happens. For small all-grain batches (1 to 2 gallons), a large food jar with a false bottom (you can make a simple one from sanitized stainless steel mesh) works perfectly as a mini mash tun. The insulation of the glass or thick plastic jar helps keep the mash at the ideal temperature (between 145°F and 158°F, depending on the beer style) for 60 to 90 minutes, so the conversion happens fully. No need for a big, bulky mash tun when you’re only brewing a small batch—just heat your water, add your grains, seal the jar, and let it sit. Lautering is the step where you separate the sweet wort from the spent grain, and the wide mouth of a food jar makes it easy to pour the wort through a mesh sieve or cheesecloth without spilling, which is a huge win for beginners who tend to mess up that step. I remember when I first started all-grain brewing, I used a 2-gallon plastic food jar for a batch of pale ale, and I was shocked at how little grain got into my wort compared to when I used a regular pot. The jar’s narrow, stable base meant I could set it on the counter while lautering, so I had both hands free to stir the grain and pour the wort. That’s a small convenience, but it makes a big difference when you’re in the middle of a 2-hour brew day.
Then there’s post-fermentation storage and conditioning, which is another area where food jars outperform more traditional vessels for small batches. After primary fermentation, many brewers move their beer to a secondary fermentation vessel to clear it, develop flavors, or add ingredients like fruit, hops, or spices. A food jar is perfect for secondary fermentation because its airtight seal and visibility let you monitor conditioning closely. For example, if you’re making a fruit-infused wheat beer, you can add berries to a 1-gallon food jar, let it condition for 2 to 4 weeks, and check regularly if the fruit is adding the right flavor without turning the beer sour. Unlike plastic buckets, glass food jars won’t absorb fruit flavors, so you can reuse them for different styles of beer without cross-contamination. Conditioning in jars is also great for carbonation if you’re bottling small batches or even kegging on a budget—you can prime your beer with the right amount of sugar, seal the jar, and let it carbonate at room temperature for a week, then move it to the fridge. I’ve had customers who use my half-gallon jars for bottling 1-liter “growler” sizes of their beer, and they tell me the glass keeps the beer fresh for longer than plastic growlers, because plastic can let oxygen seep in over time, which makes beer go flat or taste stale. That’s a key point: beer is sensitive to oxygen, and the tight, non-porous seal of a quality food jar protects it much better than cheaper, thinner plastic containers.
Now, I want to be honest with you—food jars aren’t perfect for every brewing task. They’re not ideal for large batches over 5 gallons, because you’ll have to lift and move a heavy jar full of liquid, which is a safety hazard. They also don’t work well for long-term lager fermentation, which requires precise temperature control in large volumes, though they’re great for small lagers if you have a temperature-controlled fridge. But for small-batch brewers, experimental brews, test batches, or specific steps in a larger brew day, they’re unbeatable in terms of cost, visibility, and reliability. The biggest mistake I see new brewers make is overinvesting in fancy equipment before they’re sure they’ll stick to home brewing. A set of quality food jars costs a fraction of what a dedicated fermentation bucket or mash tun costs, and they can be used for years if you clean and sanitize them properly. I always tell new brewers to start with 2 to 3 1-gallon food jars, a few rubber gasket lids with fermentation airlocks, and a hydrometer, and then add more equipment as they gain experience.
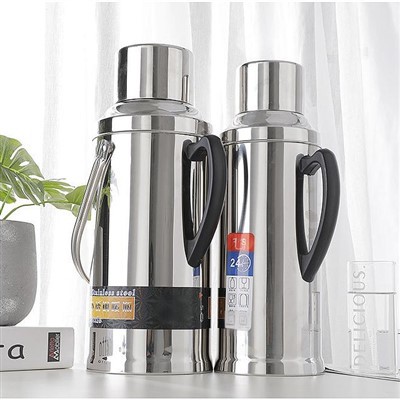
If you’re a home brewer looking to upgrade your setup without breaking the bank, or if you’re tired of dealing with opaque, hard-to-clean brewing vessels, food jars are the way to go. I supply a range of food-grade brewing jars designed specifically for home brewers, with durable seals, wide mouths for easy cleaning, and thermal stability that holds up to every step of the brew process. Whether you’re making your first test batch of ale, perfecting a yeast starter, or conditioning a fruit beer, these jars are reliable, affordable, and give you the visibility you need to make great beer every time. If you’re ready to stock up or want to learn more about how my food jars can work for your home brewing needs, feel free to reach out for a procurement consultation. I’m always happy to chat with fellow brewers, answer questions about jar care, or help you find the right size for your batches.
Stainless Steel Food Jar References
- Stewart, G. G., & Russell, I. (2016). Brewing Science: A Multidisciplinary Approach. CRC Press.
- White, C., & Zainasheff, J. (2010). Yeast: The Practical Guide to Beer Fermentation. Brewers Publications.
- Fix, G. (1999). All-Grain Brewing: A Practical Guide to Modern Mashing Techniques. Brewers Publications.
- Shellhammer, T. H. (2018). Beer Quality: A Guide for the Brewer. Master Brewers Association of the Americas.
Kairun International Co., Ltd.
With abundant experience, we are one of the most professional food jar suppliers in China. Please feel free to wholesale customized food jar made in China here from our factory. For more cheap products, contact us now.
Address: NO. 60 JIAZHAI,NANSHI DISTRICT,DONGYANG CITY,ZHEJIANG PROVINCE, CHINA
E-mail: lanzhou301@126.com
WebSite: https://www.kairun-houseware.com/
