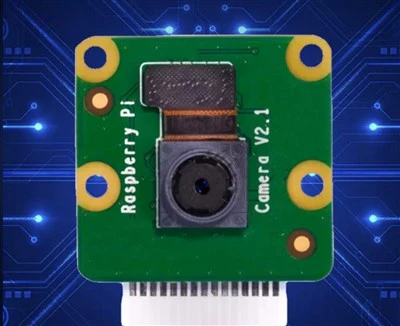
Time-lapse photography is a captivating technique that condenses hours, days, or even months of real-time events into a short video sequence. It allows viewers to witness the passage of time in a mesmerizing way, from the flow of clouds across the sky to the blooming of a flower. As a finished camera supplier, I understand the importance of setting up the right equipment and parameters to achieve stunning time-lapse results. In this blog post, I will guide you through the process of setting up a finished camera for time-lapse shooting. Finished Camera
Step 1: Choose the Right Camera
The first step in setting up a time-lapse camera is to choose the right one for your needs. There are several factors to consider when selecting a camera, including resolution, frame rate, sensor size, and battery life.
- Resolution: The resolution of the camera determines the quality and clarity of your time-lapse images. Higher resolutions, such as 4K or 8K, will produce more detailed and sharp images but also require more storage space.
- Frame Rate: The frame rate of the camera determines how many frames are captured per second. For time-lapse photography, a lower frame rate, such as 1 frame per second (fps) or 1 frame every few seconds, is typically used to create a smooth and natural-looking time-lapse effect.
- Sensor Size: The sensor size of the camera affects the image quality and low-light performance. Larger sensors generally produce better image quality and can handle low-light conditions more effectively.
- Battery Life: Since time-lapse shooting can take hours or even days, it is important to choose a camera with long battery life. Some cameras also offer the option to use an external power source to ensure continuous operation.
As a finished camera supplier, I offer a wide range of cameras that are suitable for time-lapse shooting, from entry-level models to professional-grade cameras. Our cameras are equipped with high-resolution sensors, adjustable frame rates, and long battery life to ensure that you can capture stunning time-lapse videos with ease.
Step 2: Select the Right Lens
The next step in setting up a time-lapse camera is to select the right lens. The lens you choose will depend on the type of time-lapse you want to create and the subject you are shooting.
- Wide-Angle Lens: A wide-angle lens is ideal for capturing landscapes, cityscapes, and other large-scale scenes. It allows you to capture a wider field of view and can create a sense of depth and perspective in your time-lapse images.
- Telephoto Lens: A telephoto lens is suitable for capturing distant subjects, such as wildlife, sports events, or celestial objects. It allows you to zoom in on the subject and capture details that are not visible with a wide-angle lens.
- Macro Lens: A macro lens is designed for close-up photography and is ideal for capturing small subjects, such as flowers, insects, or microscopic details. It allows you to get very close to the subject and capture detailed images with a shallow depth of field.
When selecting a lens, it is important to consider the focal length, aperture, and image quality. A high-quality lens will produce sharp and clear images with minimal distortion and aberration.
Step 3: Set Up the Camera
Once you have chosen the right camera and lens, the next step is to set up the camera for time-lapse shooting. Here are some important settings to adjust:
- Shutter Speed: The shutter speed determines how long the camera’s sensor is exposed to light. For time-lapse photography, a slower shutter speed, such as 1/30 second or slower, is typically used to create a smooth and natural-looking time-lapse effect.
- Aperture: The aperture determines the size of the opening in the lens through which light passes. A larger aperture, such as f/2.8 or wider, allows more light to enter the camera and can create a shallow depth of field, which is ideal for portrait or close-up time-lapse photography.
- ISO: The ISO determines the sensitivity of the camera’s sensor to light. A lower ISO, such as 100 or 200, produces less noise and better image quality, but requires more light. A higher ISO, such as 800 or 1600, can be used in low-light conditions, but may result in more noise and a decrease in image quality.
- White Balance: The white balance determines the color temperature of the images. It is important to set the white balance correctly to ensure that the colors in your time-lapse images are accurate and natural-looking.
- Focus: The focus determines the sharpness of the images. For time-lapse photography, it is important to set the focus correctly and ensure that it remains consistent throughout the entire time-lapse sequence.
In addition to these settings, you may also want to adjust the camera’s exposure compensation, metering mode, and other settings depending on the lighting conditions and the type of time-lapse you want to create.
Step 4: Set Up the Intervalometer
An intervalometer is a device that allows you to control the interval between each frame in a time-lapse sequence. It is an essential tool for time-lapse photography, as it ensures that the frames are captured at a consistent interval and that the time-lapse effect is smooth and natural-looking.
Most modern cameras come with built-in intervalometers, but if your camera does not have one, you can purchase an external intervalometer. To set up the intervalometer, follow these steps:
- Connect the Intervalometer: Connect the intervalometer to the camera using the appropriate cable or connector.
- Set the Interval: Set the interval between each frame in the time-lapse sequence. The interval will depend on the speed of the action you are capturing and the length of the time-lapse video you want to create. For example, if you are capturing a sunset, you may want to set the interval to 1 frame every 5 seconds.
- Set the Number of Frames: Set the number of frames you want to capture in the time-lapse sequence. This will depend on the length of the time-lapse video you want to create and the frame rate you are using. For example, if you want to create a 10-second time-lapse video at 24 fps, you will need to capture 240 frames.
- Start the Time-Lapse Sequence: Once you have set the interval and the number of frames, press the start button on the intervalometer to begin the time-lapse sequence. The camera will then capture each frame at the specified interval until the sequence is complete.
Step 5: Mount the Camera
To ensure that the camera remains stable and stationary during the time-lapse sequence, it is important to mount the camera on a tripod or other stable surface. Here are some tips for mounting the camera:
- Choose a Stable Tripod: Choose a tripod that is sturdy and stable enough to support the weight of the camera and lens. Make sure the tripod is level and that the legs are securely locked in place.
- Use a Remote Shutter Release: To avoid camera shake, use a remote shutter release or the camera’s self-timer to trigger the camera. This will ensure that the camera remains stationary during the exposure.
- Position the Camera: Position the camera at the desired angle and composition. Use the camera’s viewfinder or LCD screen to frame the shot and make any necessary adjustments.
Step 6: Monitor the Time-Lapse Sequence
Once you have set up the camera and started the time-lapse sequence, it is important to monitor the sequence to ensure that everything is working properly. Here are some tips for monitoring the time-lapse sequence:
- Check the Focus and Exposure: Periodically check the focus and exposure of the camera to ensure that the images are sharp and well-exposed. If necessary, make any adjustments to the camera settings.
- Check the Battery Life: Check the battery life of the camera and the intervalometer regularly to ensure that they have enough power to complete the time-lapse sequence. If necessary, replace the batteries or use an external power source.
- Check the Memory Card: Check the memory card to ensure that it has enough space to store all the images in the time-lapse sequence. If necessary, replace the memory card or transfer the images to a computer.
Step 7: Process and Edit the Time-Lapse Images
Once the time-lapse sequence is complete, it is time to process and edit the images to create a final time-lapse video. Here are some steps to follow:
- Transfer the Images: Transfer the images from the camera’s memory card to a computer using a card reader or a USB cable.
- Select the Best Images: Review the images and select the best ones for the time-lapse video. You may want to discard any images that are blurry, overexposed, or underexposed.
- Adjust the Color and Contrast: Use photo editing software, such as Adobe Photoshop or Lightroom, to adjust the color and contrast of the images. This will help to enhance the overall look and feel of the time-lapse video.
- Create the Time-Lapse Video: Use video editing software, such as Adobe Premiere Pro or Final Cut Pro, to create the time-lapse video. Import the selected images into the video editing software and arrange them in the desired order. Set the frame rate and duration of the video to create the time-lapse effect.
- Add Music and Effects: If desired, you can add music and effects to the time-lapse video to enhance the viewing experience.
Conclusion
Setting up a finished camera for time-lapse shooting requires careful planning and attention to detail. By choosing the right camera and lens, setting up the camera correctly, using an intervalometer, mounting the camera on a stable surface, monitoring the time-lapse sequence, and processing and editing the images, you can create stunning time-lapse videos that capture the beauty and wonder of the world around us.
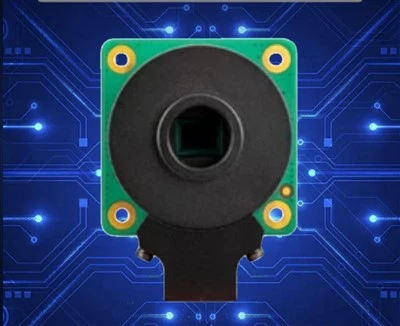
Camera Module for Drone As a finished camera supplier, I am committed to providing high-quality cameras and accessories that are suitable for time-lapse shooting. If you are interested in purchasing a camera for time-lapse photography or have any questions or concerns, please feel free to contact me for more information. I look forward to helping you achieve your time-lapse photography goals.
References
- Adams, A. (1981). The Camera. Little, Brown and Company.
- Peterson, B. (2011). Understanding Exposure: How to Shoot Great Photographs with Any Camera. Amherst Media.
- Neumann, J. (2012). Time-Lapse Photography: From Snapshots to Great Shots. Rocky Nook.
Shenzhen Juchangxing Technology Co., Ltd.
We are one of the most experienced finished camera manufacturers and suppliers in China, also support custom service. We warmly welcome you to wholesale durable finished camera at competitive price from our factory. If you have any enquiry about cooperation, please feel free to email us.
Address: 3rd Floor, Build A, No. 8, Huangdiyin IndustrialZone, Longhua District, Shenzhen.
E-mail: sales@juchangxing.com
WebSite: https://www.jcxcamera.com/
